


The time is finally here and the queen builtin bunks are complete and I can’t wait to show you how they turned out. I have built two others beds, my king canopy bed, and a cane daybed but builtin style bed… never. This whole plan originated because of the irregular shape of my sons room. I wanted to make the most of his large room and the fact that we frequently have family in town and wanted to house all the kids in a “bunk room,” because isn’t that every kids dream? I know it was mine! So alas the builtin bunks came to fruition. I was inspired by @plankandpillows bunks and of course a slew of Studio McGee Bunks.
The Plan
The plan for the queen builtin bunks evolved due to space restrictions and functionality. During the planning phase my son said he HAD to have a slide (because, hello, they aren’t cool unless you can play on them), and we definitely wanted to utilize space with a little bookshelf cubby where he can put his favorite books and water bottle.

The first plan for the bunk was with a slide going into the middle of the room, and a few different cubbies. This plan was developed because I wanted the location of the ladder off to the foot of the bed. So the slide closest so my kids wouldn’t be running across the bed every time to get to the slide. Maybe thats funny reasoning haha, but that’s how the plan came to be.
I sat on plan A for a month and a half while we finished up some other projects and something about it just didn’t sit right. So after some rearranging on Sketchup (the free web based software I use to create my plans). And some Pinterest inspiration (are you following me on Pinterest? if you aren’t… you should be @honeybuilthome.

Plan B
The finished plan! I moved the ladder to the window wall which also made a lot more sense with the bookcase cubbies only along one wall. I added an accent wall of stained skinny lap to separate the bed structure from the slide. The slats being space keeps the slide feeling open, but also provides the safety component so a kid doesn’t come toppling down from the top bunk to the middle of the slide. When I was mid project I noticed there was over a foot of crawl space under the slide that was going to go wasted. I knew this would be the perfect spot for a secret door because, hello!! What did doesn’t want a secret hiding spot.
Mapping out the build
I didn’t follow any set of building plans for this bunk although I did take some structural guidance from the plank and pillow post I mentioned at the beginning. I wanted to construct the entire bottom section as pony walls, or half walls, and build the top structure to sit on those pony walls. Doing it this way I’M SURE used a LOT more 2×4’s than if I would have built a basic structure anchored to the middle of the wall, but tomato, ta-mat-oh.

Electrical
This step is totally unncessary, but I figured since I was going to be basically building new walls, I might as well move some of the electrical to give them working reading lights in each of the bunks. I go into a little more detail over on my instagram stories on this whole process, it’s saved to a highlight bubble: electrical. *if you are unsure always consult an electrician.

Framing the top bunk
Can we say workout or what? Hoisting miniature walls and sitting on 2×4’s to build this top section was NO JOKE, but it made the bunks really start to take shape and come alive.

Shiplap & Trim

I’m not sure if I was being neive or smart, but I honestly thought that shiplapping the entire bunk was going to be SO MUCH easier than trimming it all out with plywood. I think the thought came from the idea that I wouldn’t have to do so much measuring and custom cuts with shiplap, but I proved myself wrong really quick with the bookcase cubbies. Plus shiplap is progressive so once I started at the bottom of the bottom bunk, I couldn’t just pick a stopping point and start at the top of the top bunk. If I did that somewhere along the front would be misaligned. Needless to say, I love the look of it, but in hindsight I would have done a LOT more planning.

The Slide
This part probably intimidated me the most, but ironically enough it was the easiest part of the entire build. The slide is a 3/4″ thick piece of melamine (ya know, the shiney stuff all closets and ikea furniture it made from). I mounted a 1×3 onto the side of the bed at a 27 degree angle. Then a matching one into the studs of the wall. The melamine slide part just sits on top of these two support pieces. It is attached with wood glue and pocket screws. 27 degrees might sound like a random number, but a traditional slide is between 22-30 degrees. Anything greater than 30 is considered too steep for a child’s slide and could risk injury… and 22 seems… slow 😉


Paint
A combination of a great paint sprayer Graco TC Pro + high quality paint, Sherwin Williams Emerald Urethane Trim enamel = Glass Finish.
Urethane Trim Enamel was sprayed onto the shiplap of the bunks. It hardens and cures, doesn’t require a top coat and if durable and self leveling. Ideal for a wood like surface such as these bunks. The color is SW 6223 Still Water in Satin finish.
The same color is on the walls, but in the interior acrylic, a durable paint for walls, in satin.

Stained Pine Skinny Lap

The biggest headache of the entire build was having to sand and stain. And sand and re-stain all of the skinny lap boards for the bunk. The stain combination I ended up settling with and LOVE is white wash stain. (light coat, wipe off after applying), + flagstone stain applied lightly. Then lightly wiped off. This was after sanding down all of the 1×2″ common pine boards with 80 then 220 grit sand paper. I nailed each one up with a 1/2″ spacing between… then left a little section to create a secret door!

The Secret Door

This part posed a few roadblocks because the way the slats were installed. The door would have to open toward you to fall in line with the other slats. This meant it would open into the mattress… or not open at all because the mattress would be in the way. So I decided to cut down the slats to allow the door to open away from you or into the cubby. It isn’t perfect, but at first glance you’d never know. There was a whole secret 16″ by 4′ room under the slide. And I call that a win.

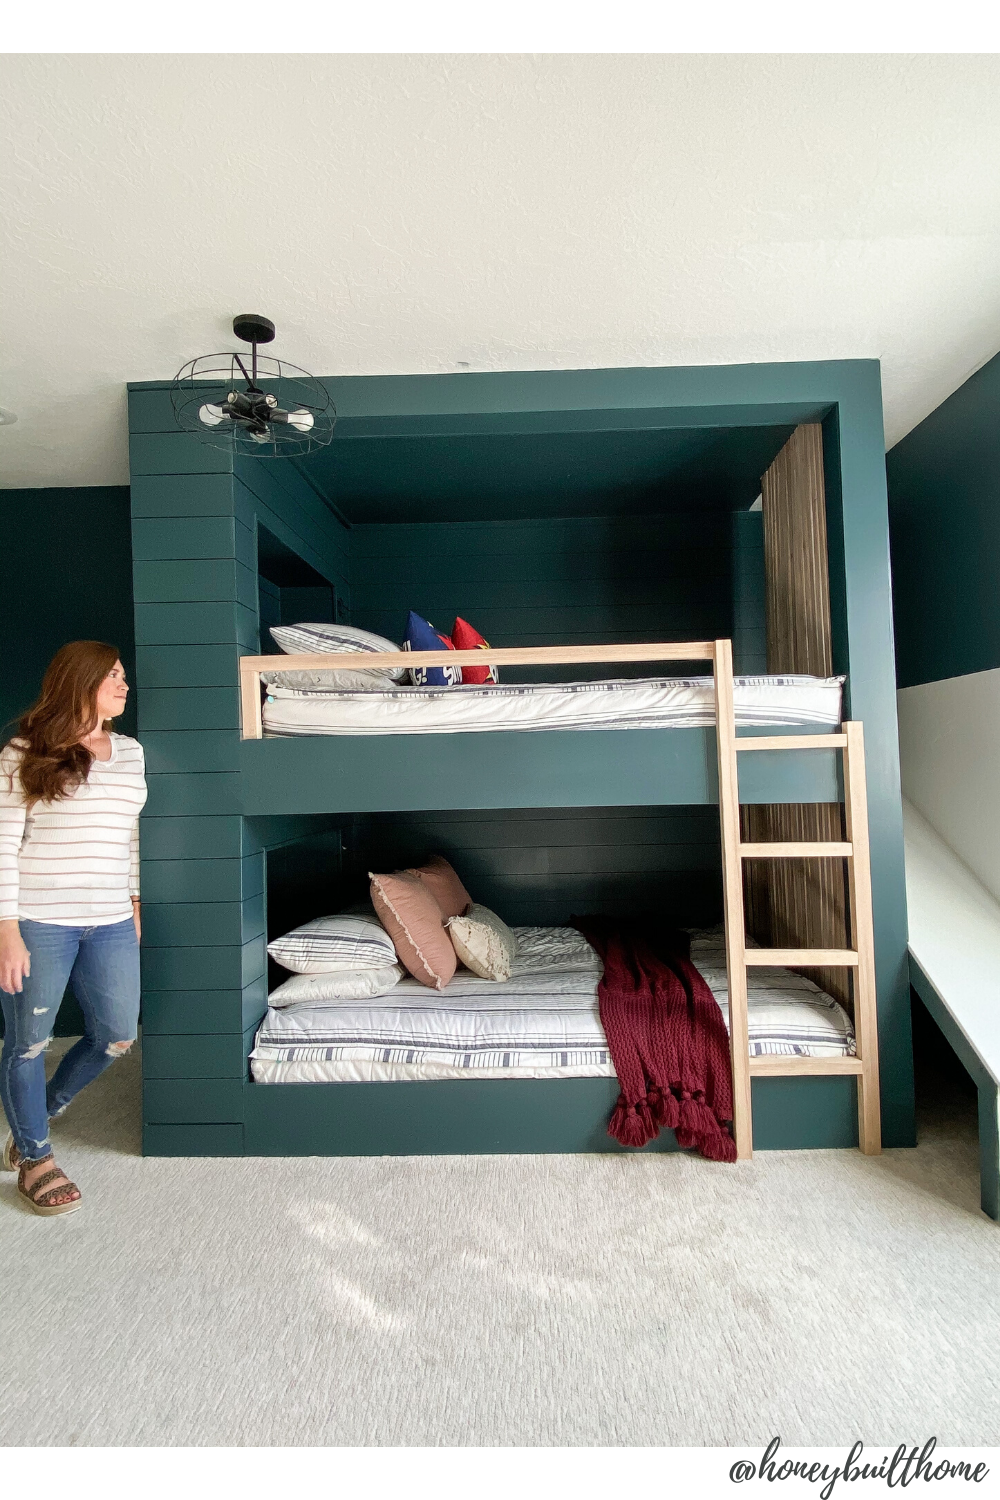
The finished builtin bunks
These builtin bunks are seriously my pride and joy. Is that weird to say about a woodworking project? I am just so thrilled with how they turned out. Functionally they are solid, the ladder is next to the slide, like I originally planned. The shiplap gives the bed dimension and the SW 6223 Still Water by Sherwin Williams color is stunningly beautiful.


Be sure to follow along on instagram @honeybuilthome for more projects and behind the scenes in stories 🙂


These bunk beds and steps, slide and secret room are exceptional!!! Your build is awesome and your creativity is to be envied! Congratulations.
Man you ROCK! This is amazing, every child’s dream! Definitely crown you Queen of DIY!