


Another week has passed (click here to see week 1 and here to see other participants and their amazing designs). and I feel like my progress pictures are lacking because this week was truly all about prep. Preparing tile to be installed by getting all the pieces cut to fit, preparing the shower walls with waterproofing and new Hardie backer board, and preparing and ordering details for the space.
First thing I did prior to leaving on vacation was to fit and cut all of the tile for the shower floor. When installing shower tile its important to note most professionals will install the walls first (leaving a gap at the bottom for one row of tile), then install the floor, and finally finish up with the last row of floor tile. Out of wanting to get something significant accomplished I went to cutting and mapped out the entire shower floor with hexagon mosaic tile. I love using mosaic on a floor type setting because the tiles come on sheets so it speeds up the process plus they are a lot more forgiving with the floor sloping towards the drain and it not being level.

the small hexagon tiles are attached to each other with this thin mesh. When I cut my tile I liked to lay it face down. This prevents the individual tiles from moving around so much as it hits the resistance of the saw blade.

To cut around the shower drain I pulled the mosaic tiles off the mesh backing that interfered with the drain. I then marked them with a pencil where they hit the drain and carefully cut off the excess with my wet saw blade.


Once I got all of the floor tiles cut I then labeled with painters tape by number 1-12 so I know what tiles go in what spot when I remove them to lay the epoxy.

I mentioned on my instagram stories (this whole journey is saved in a highlight bubble on my instagram) that there was this funky lip left between my shower pan and my wall so in order to correct the gap I bought some 1/2 inch Hardie cement board and installed it on the side wall from the lip to the ceiling using Hardie back screws. The cement board is easily cut with a utility knife, but impatient me couldn’t find one or wait to buy one so I used my angle grinder and made a disaster of my basement with cement dust.


Next it was time to prep the floor. I laid out my tile and made adjustments 1 inch here and 1 inch there to make sure that there weren’t any spots that a sliver of a tile would be required. I even got as OCD as to lay the tiles out with spacers to make sure it was accurate.

Once all the tiles were cut I then numbered them by row (including the full size tiles) 1-1, 1-2, 1-3, 1-4; 2-1, 2-2, 2-3, 2-4 and so on for all 10 rows of tiles. ( I used a tile pencil which is crayon consistency and comes off with water). This may seem like a tedious and unnecessarily thing but the last floor I did I had all the tiles cut to size and just started stacking them and gave myself several hours of additional work trying to piece together a very challenging puzzle.
Lastly, I began prepping the floors, first with primer (after a very through sweep and vacuum/wipe down) and soon with self leveling concrete.

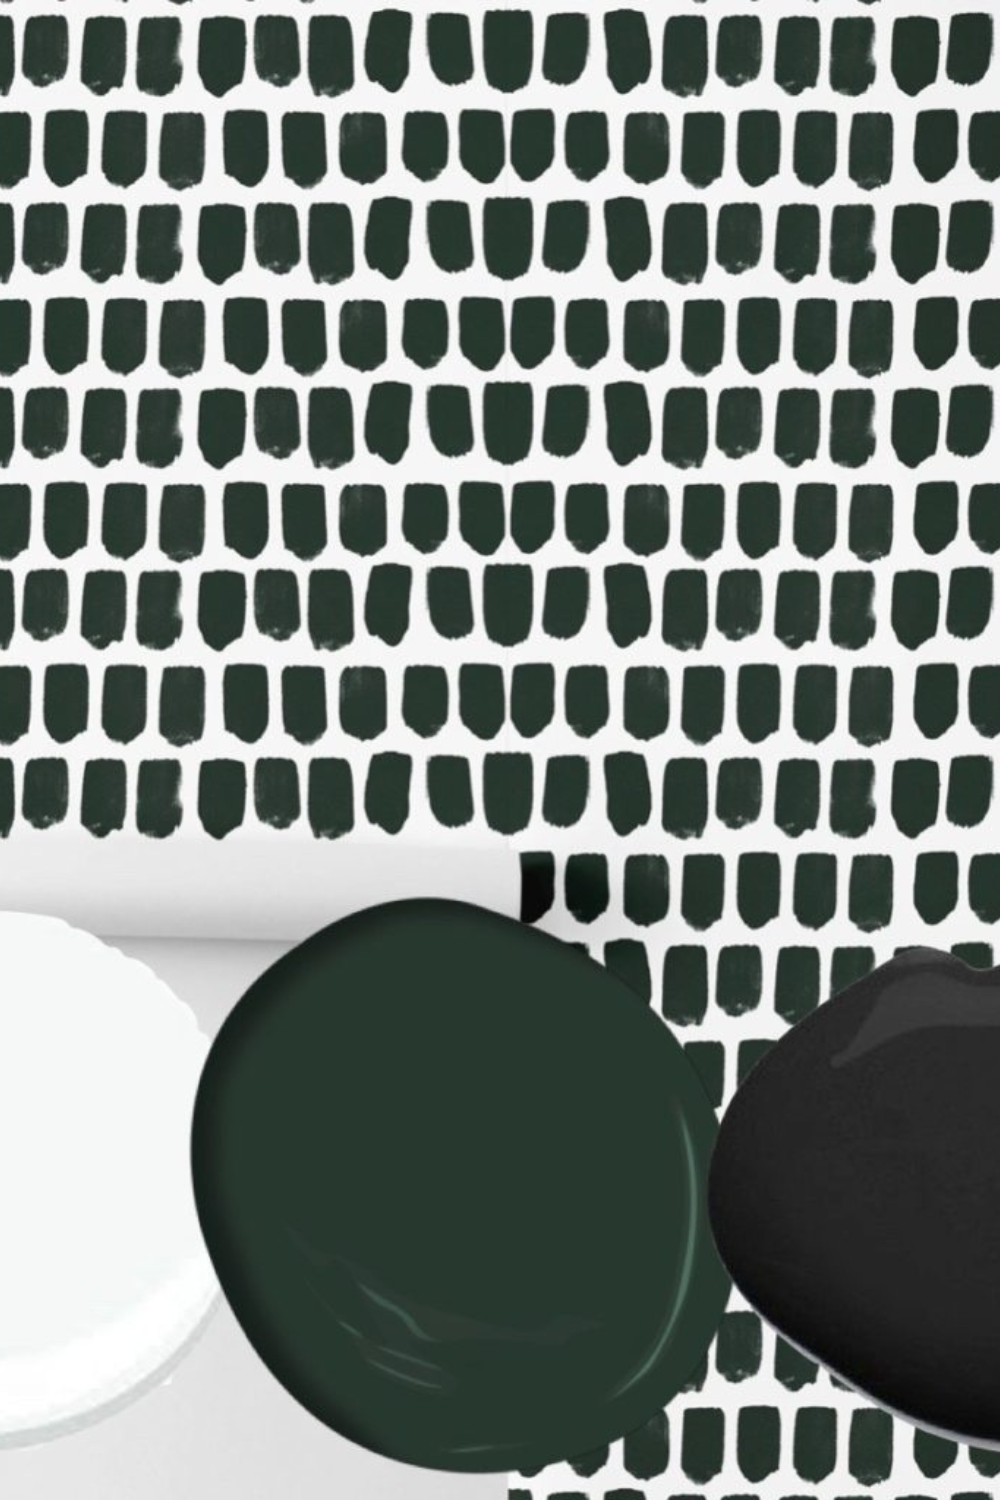
My favorite part of the week: THE DELIVERY OF MY BEAUTIFUL WALLPAPER by Livette’s Wallpaper!
Its gorgeous and everything I could have asked for. So my plan for the walls are to go a simple and inexpensive spin on board and batten/shiplap. This will be a 5′ wainscoting style with the wallpaper above it. I have been contemplating all week and still waivering on what color to do the wainscoting. Here’s the options.

- White, bright, classic
- Green, moody, same green as in the wallpaper
- Black, modern, tying in with the hexagon floor.
I’d love to hear what you think I should do, follow me on instagram and share your input and of course stay tuned for next week when I finalize the color!
Deals:
Of course my days spent on vacation I was still working “hard” on the space… in the form of shopping. Here’s just a few of the steals I found.
I found this mirror as a steal of a deal at Home Depot. They had an addition 15% off with a discount code making it $28 and I caved and threw all thoughts of a rectangular mirror out the window.

Faucet for $65! I was hard pressed to find any faucet in black for under $100-150.


I’m loving the black tile – that wallpaper is going to look incredible with it!
thank you! I’m excited to put it all together!
Nice job with the tile around the drain! The wallpaper is not my usual style but I actually LOVE it!
Looking forward to seeing the progress 🙂
Cheers,
Denise
thank you! its taken many of years of practice to get that whole tiling cutting in a circular pattern!