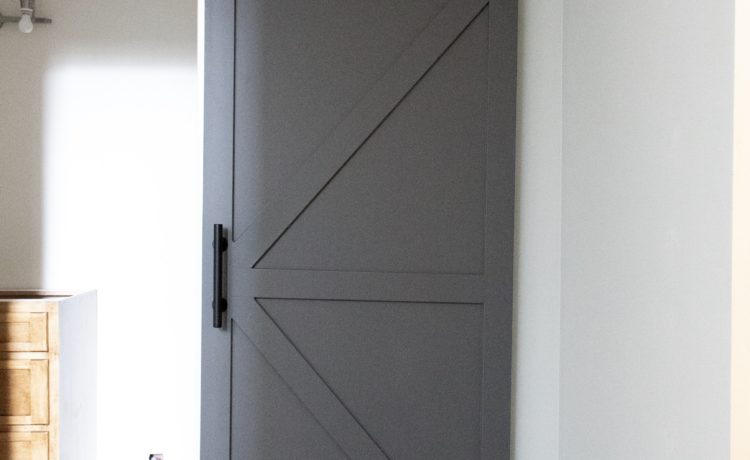


I love me a good sliding barn door, am I right?
But for a bathroom, I was NERVOUS! Because 1. privacy 2. privacy! I’ve walked through many homes with barn doors and they either pull away from the wall or are difficult to lock or have no lock at all. I did NOT want this for our basement guest bathroom so I tried everything else before alas, I built a barn door.
This bathroom is actually one that wasn’t part of our basement layout. My dad spent 4 exhausting days chipping up our concrete foundation to move the plumbing to this spot so I could have two functioning bathrooms in my basement. Because of this the bathroom is pretty narrow with a slightly unconventional layout. But enough about that, let’s get to the mind blowing EASINESS of building a barn door.
First before you hop in your car and head over to Home Depot you need to know the dimensions of the space you are covering with the door. You want to have at least an inch at the top and on both sides where the door overhangs the opening. My opening is 34″x80″, therefore I wanted my door’s dimensions to be 37″x84″.
Materials needed for sliding barn door:
4 – 1/2 inch 3 inch x 8 ft primed MDF trim $5.42 each / $21.68
2 – 1/2 inch 5.5 inch x 8 ft primed MDF trim $8.07 each / $16.14
1 -3/4 inch birch plywood cut to the dimensions of your door $58.00
(home depot will cut it down to whatever size you need for free).
Primer & Paint
Caulk
DryDex for nail holes
Wood Glue
Clamps
Finishing brad nailer and 1″ nails
[metaslider id=”203″]
** NOTE: Material list is only to trim out the front side of the door. Double your trim if you would like to trim the backside of the door. I am planning to hang a mirror on the backside of my door.
$5 off with Text or Email Signup
Free shipping on most orders over $45
Step 1 in building sliding barn door:
Rip your 4×8 sheet of plywood the dimensions of the door. Mine was ripped to 37″ x 84″ (later trimmed down to 82 11/16″)


Step 2:
Cut 2 of the 5.5″ trims to the width of your door. One will go on the top and the other on the bottom.

Step 3:
Cut your vertical trim 3″ pieces to size. Mine are 72.5″

Step 4:
Cut another 3 inch board to fit snugly midline at 29 7/8″


Step 5.
Mark the center of your 3″ trim and line it up with the corner as shown. I stuck my diagonal piece under the other two to trace where it would hit. and cut accordingly. Do the same on all 4 corners.


Late Night Shopping? Buy Online, Pick Up In Store


Rough fit all of your pieces to make sure they will fit snugly and straight on your plywood. Now it’s time to GLUE and NAIL the boards in place.
Use a bead of wood glue and some clamps to hold your trim pieces in place. I next took my brad nail gun and put some 3/4″ nails for added security. Let dry over night.

Once 9ts dry and secure you can start filling all of the seams with nail holes with drydex speckling to plastic wood filler and caulk.


Once it’s all dry its time to sand and wipe away with your tack cloth.
Tack cloth is a super stick cloth that picks up any loose dust and fuss to create a smooth painting surface.

Prime and Paint!


Steps on hanging the door to come soon!


+ show Comments
- Hide Comments
add a comment